A denim jacket places buttons, seams, pockets, cuffs, and textured fabric close to the hands. That makes a turquoise-colored ring look especially effective—but it also creates contact points that a static product photograph never tests. The most useful styling method is therefore a checklist completed in sequence: verify the exact ring, build the hand arrangement, test it against the jacket, add the rest of the outfit, and repeat the test during real movements.
This guide applies that sequence to two current Oroxen examples: the Turquoise Vintage Geometric Cross Ring and the Turquoise Vintage Heart Cross Ring for Women. Their names describe visible style language, not proven gemstone identity, metal composition, age, or provenance. Complete the facts checklist before making material, fit, care, or value assumptions.
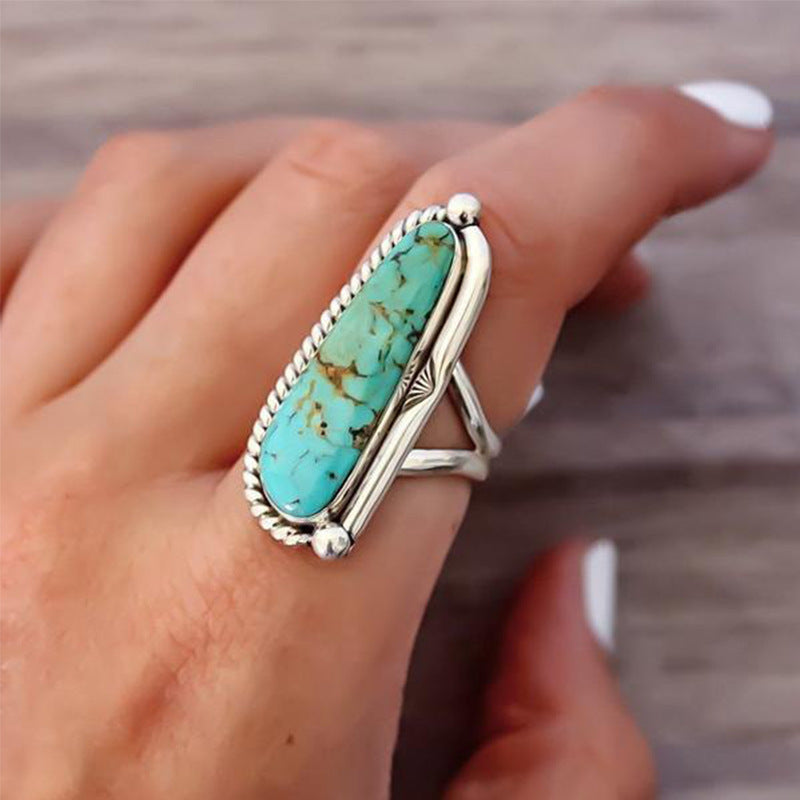
Checklist 1: Define the Ring’s Job
Before opening the jewelry box, finish this sentence: “The ring should be the outfit’s ___.” Choose one answer—main focal point, secondary color echo, motif echo, or quiet finishing detail. A vague role leads to repeated accessories with no visual order.
- If the ring leads, leave at least one neighboring finger visually quiet and reduce the nearest bracelet or cuff competition.
- If it echoes color, let earrings, a necklace, or a garment detail lead from another zone.
- If it echoes a motif, change color or scale so the outfit does not look like a literal set.
- If it finishes the look, judge comfort and movement before visibility.
Use the public Western Turquoise Ring Style, Fit & Care guide for a broader ring foundation, then return to the exact option in this checklist.
Checklist 2: Verify the Listing Before Planning an Outfit
Create a facts card with the product title, option label, inner diameter or circumference, intended size range, band width, ring-face height and width, profile, total weight, construction, component materials, permitted adjustment, care directions, and return eligibility. Mark each field “confirmed,” “not stated,” or “not applicable.” Never replace a blank with a visual guess.
The current Turquoise Vintage Geometric Cross Ring page displays one Color selector and a Size choice labeled “One Size.” “One Size” is not a universal finger measurement. Ask what exact inner dimension it represents, whether the band is fixed or adjustable, and what range or method applies if adjustment is permitted. The visible page reviewed for this draft did not provide those details.
The current Turquoise Vintage Heart Cross Ring for Women page shows a Color selector but no visible size selector in the captured page state. That does not establish a fixed size, adjustable construction, or universal fit. Obtain the actual measurement and construction before ordering.
Checklist 3: Measure the Intended Finger
Measure the exact finger on the exact hand under ordinary conditions. Finger dimensions can differ between hands and change with temperature, time of day, swelling, activity, and wide-band coverage. A known comfortable ring or professional sizing method is more useful than guessing from clothing size or a photograph.
Record knuckle width, the point where the ring will sit, and whether the finger tapers. For a larger face, note how much of the visible finger it will cover. If the face extends toward adjacent fingers, check clearance while making a gentle fist. Do not force a ring over the knuckle, compress circulation, or repeatedly bend an unknown adjustable construction.
When gifting, do not assume an adjustable-looking band eliminates sizing. Seek the documented range and adjustment method. Preserve the seller’s current return and exchange information in case the recipient needs another option.
Checklist 4: Choose the Hand and Finger by Activity
The dominant hand often handles phones, keys, bags, writing tools, and door hardware more frequently. The nondominant hand may carry a watch or steady objects. Try the planned ring position during the wearer’s real daily tasks rather than following a universal “best finger” rule.
- Hold a phone and type a short message.
- Use jacket buttons, snaps, zipper, and pockets.
- Carry the normal bag by its actual handles or strap.
- Sit at a desk and use keyboard and mouse.
- Lift a cup and handle keys carefully.
Remove the ring for unsafe work, exercise, tools, machinery, food preparation, medical procedures, or any activity where workplace rules or physical contact make wear inappropriate. Styling goals do not override safety.
Checklist 5: Map Ring Scale Against the Denim Cuff
Wear the jacket in three sleeve states: full length, one broad roll, and a narrower double roll if the garment allows it. Keep the ring position unchanged. Photograph the hand resting at the side, touching the pocket opening, holding the lapel, and raised near the face. These frames reveal how the ring relates to the nearest horizontal line.
A broad cuff may visually shorten the exposed wrist and make the ring feel more concentrated. A full sleeve can isolate the hand so one ring gains importance. A decorated or frayed cuff adds texture that may compete with an elaborate ring face. There is no universally correct roll; choose the state that supports the assigned ring job and remains comfortable.
Check physical contact, too. A projecting motif can meet buttons, rivets, snaps, heavy seams, or rough pocket edges. If repeated contact appears, change finger, hand, sleeve state, or ring choice rather than accepting damage or snag risk.

Checklist 6: Build the First Outfit Around the Geometric Cross Ring
Begin with a solid top, straight or relaxed trousers, simple boots or shoes, and the denim jacket. Place the geometric cross ring on the finger identified by the activity test. Keep the neighboring fingers quiet and omit a bracelet for the first photograph. The objective is to discover the ring’s natural visual strength before adding support.
Next, introduce only one secondary signal. It might be a narrow bracelet on the opposite wrist, small earrings, a belt with restrained hardware, or a simple necklace. Do not repeat cross shapes in every zone. Repeating one quality—perhaps the cool color or geometric structure—is enough to connect the outfit.
Review full-body photographs instead of judging only a hand close-up. If the ring dominates more than intended, add visual weight at the opposite side of the silhouette or reduce contrast at the cuff. If it disappears, simplify the nearest wrist and jacket details. The Western Rings collection offers additional current silhouettes for comparison.
Checklist 7: Build a Different Formula Around the Heart Cross Ring
Give the second ring a different job so the comparison is meaningful. Instead of a single ring focal point, use the heart cross design as a motif echo in a softer outfit: a plain dress or blouse, open denim jacket, restrained boots, and one face-level accessory without a matching heart or cross.
Try the ring on the opposite hand from the first formula. This distributes attention and exposes different practical interactions. A bag carried on that side, a watch, or jacket pocket use may change the result. Photograph hands naturally instead of holding the motif toward the camera.
If the ring should become dressier, polish the surrounding silhouette rather than stacking more symbols. Choose a cleaner jacket, uninterrupted color area, structured bag, or simpler shoe. “Dressy” is often created by editing and fit, not by the number of accessories.
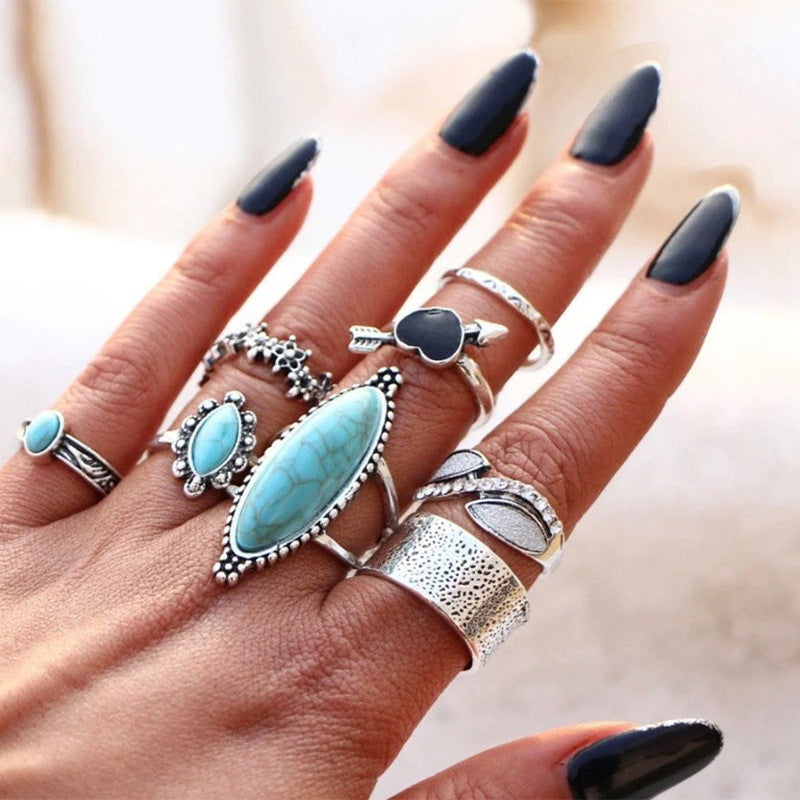
Checklist 8: Coordinate Bracelets Without Creating a Collision Zone
A ring and bracelet are read together whenever the hand moves. First test the ring with a bare wrist. Then add one bracelet to the same hand and repeat wrist flexion, pocket use, phone handling, and bag carrying. Finally, move the bracelet to the opposite wrist and compare comfort and visual balance.
Leave enough physical clearance that rigid or projecting parts do not repeatedly meet. A dense bracelet stack can turn hand and wrist into one heavy visual block, which may overwhelm the jacket cuff. If maximal styling is the goal, distribute size and texture deliberately rather than layering by color alone.
Browse the broader Western Jewelry collection to compare supporting categories, but do not add a piece merely to satisfy a theme. The ring checklist should still pass after every addition.
Checklist 9: Audit Color, Motif, and Finish Separately
Color repetition, motif repetition, and finish repetition are three different tools. Use no more than two strongly in a beginner outfit. For example, repeat the turquoise-colored area in small earrings while changing the motif and finish. Or repeat a geometric shape in a bag seam while keeping the color neutral. Or echo the apparent metal tone while allowing the ring to supply the only turquoise-colored signal.
Do not assume that similarly colored products use the same material or coating. Likewise, two “vintage” product names do not prove a shared age or manufacturing process. Treat the terms as visual navigation until exact facts are documented.
Checklist 10: Use the Video as a Research Prompt, Not Product Proof
The supplementary video is Turquoise in Rings by Turquoise in America. Its YouTube page was available when this draft was prepared, but no transcript was available for review. This article therefore does not quote the video or assign any of its claims to the two Oroxen listings.
Watch it fully and write down questions about ring construction, terminology, turquoise identification, treatments, fit, and care. Then verify those questions against qualified sources and option-specific product documentation. A general educational video cannot authenticate a particular online product.
Checklist 11: Run a Ten-Minute Movement Test
Wear the completed outfit indoors for ten minutes. Use a timer and rotate through ordinary actions: walking, sitting, crossing arms, using the jacket pockets, holding a phone, opening a bag, and putting the jacket on and off. Stop immediately if the ring pinches, catches, rotates uncontrollably, scratches, or interferes with grip.
Record the exact problem instead of declaring that the whole style “does not work.” A catch at the pocket may be solved by moving the ring to the other hand. Bracelet contact may disappear when wrist pieces are separated. Excess rotation may require a different verified fit. A visual conflict may improve with a quieter cuff. Specific observations create usable revisions.
Checklist 12: Photograph Four Distances
- Hand close-up: confirms orientation, neighboring fingers, and visible contact.
- Upper body: shows the hand near jacket buttons, pockets, necklace, and earrings.
- Full body: reveals whether boots, bag, belt, and hat overpower or support the ring.
- Movement frame: shows the ring during a natural gesture rather than a product pose.
Do not use photographs to judge body shape or personal worth. Use them as a placement record. If the ring should lead but only appears in the close-up, simplify nearby signals or revise its role. If it dominates every distance, decide whether that statement is intentional.
Checklist 13: Confirm Care and Purchase Conditions
Do not soak, steam, ultrasonically clean, polish, or expose an unverified ring to chemical cleaners. Suitable care depends on confirmed stones or imitation components, settings, adhesives, plating, coatings, base metal, and construction. Request directions for the exact option.
Remove rings for swimming, exercise, tools, harsh chemicals, and situations where impact or contamination is likely, unless documented guidance and activity rules support wear. Store pieces separately in a dry, protected place. Inspect the band, setting, decorative connections, and surface after use.
Before checkout, recheck current price, availability, processing time, delivery destination, and return or exchange terms. Save a dated copy of the selected option and fit information. Store policies and inventory can change.
Frequently Asked Questions
How should a beginner choose between these two rings?
Compare documented inner size, band and face dimensions, profile, weight, materials, adjustment, comfort, activity, and assigned outfit role. Motif preference comes after safe fit facts.
Does “One Size” mean the geometric ring fits every finger?
No. It is a listing label. Obtain the exact inner measurement, construction, intended range, and any approved adjustment method.
Can the heart cross ring be assumed adjustable?
No. The captured page did not visibly show a size selector or adjustment instructions. Verify actual construction and measurement before purchase.
Which denim wash works best?
No wash is universally best. Compare contrast, jacket hardware, cuff texture, the rest of the outfit, and the ring’s assigned role. Test light, medium, and dark denim already in the wardrobe.
Where should a reader continue?
Read the public Cowgirl Jewelry Style Guide and Country Concert Jewelry Guide, browse Western Rings, or return to the Oroxen home page.
Final Wear-or-Revise Decision
The outfit passes when the exact ring fits comfortably, survives ordinary movement, clears the denim cuff and hardware, performs its assigned visual job, and rests on verified product facts. If any checkpoint fails, revise one variable and test again. Do not solve every issue by adding another accessory.
A checklist makes turquoise-colored rings easier to style because it separates appearance from evidence and a still photograph from real use. Choose the job, confirm the option, measure the finger, test the jacket, audit the full silhouette, and protect the piece according to its actual construction. The result should feel intentional at hand distance and believable from across the room.